Update: In November, 2017: Facebook changed its API so that only Business Pages with 2,000+ Likes can install custom tabs as described below.
To add your smart waiver directly to your Facebook Business Page:
1. Log in to your Facebook account and then click on this link.
2. Choose your Facebook Page and click on the Add Page Tab link
3. Click on the Sign Our Waiver Tab on the side of your Facebook Page. Note, you may need to click on the More tab to see the Sign Our Waiver tab.
4. Enter your Smartwaiver username and click Save

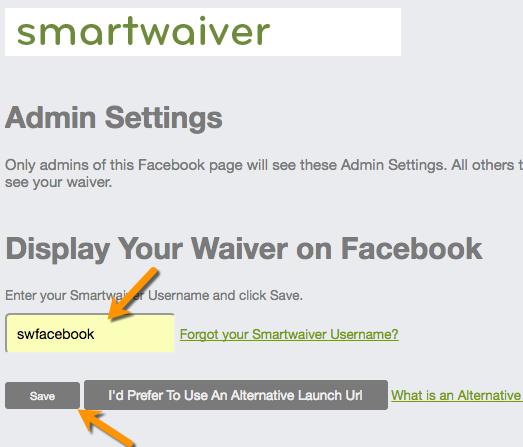
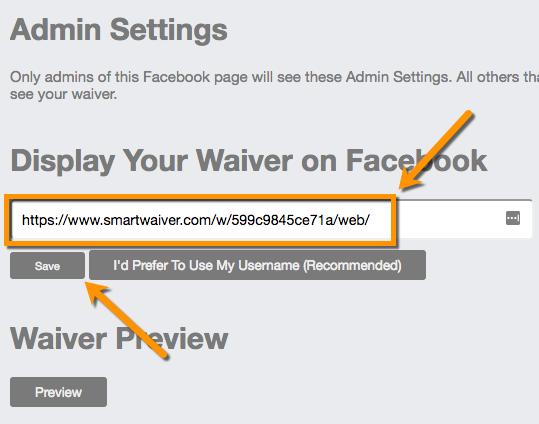
The waiver listed first in your account will be the default waiver shown on your Facebook page. If you'd prefer to use a specific digital waiver URL, and not your default waiver, click on the I'd Prefer To Use An Alternative Launch URL. Enter your Alternative Launch URL and click Save.

A link to your digital waiver will now appear as a Facebook Tab on your page. When clicked, users will be able to complete your waiver directly from your Facebook Page (you can only view your Page's waiver as a user who is not an Admin)