
Adding the Smartwaiver Waiver Widget plugin to your WordPress site allows participants to sign your smart waiver without ever leaving your website.
Please Note: Smartwaiver is unable to troubleshoot WordPress related issues.
How to add the Waiver Widget plugin in WordPress:
Note: WordPress Version 51. or higher is required.
1. Log in to your WordPress admin account.
2. Click on Plugins and then Add New.
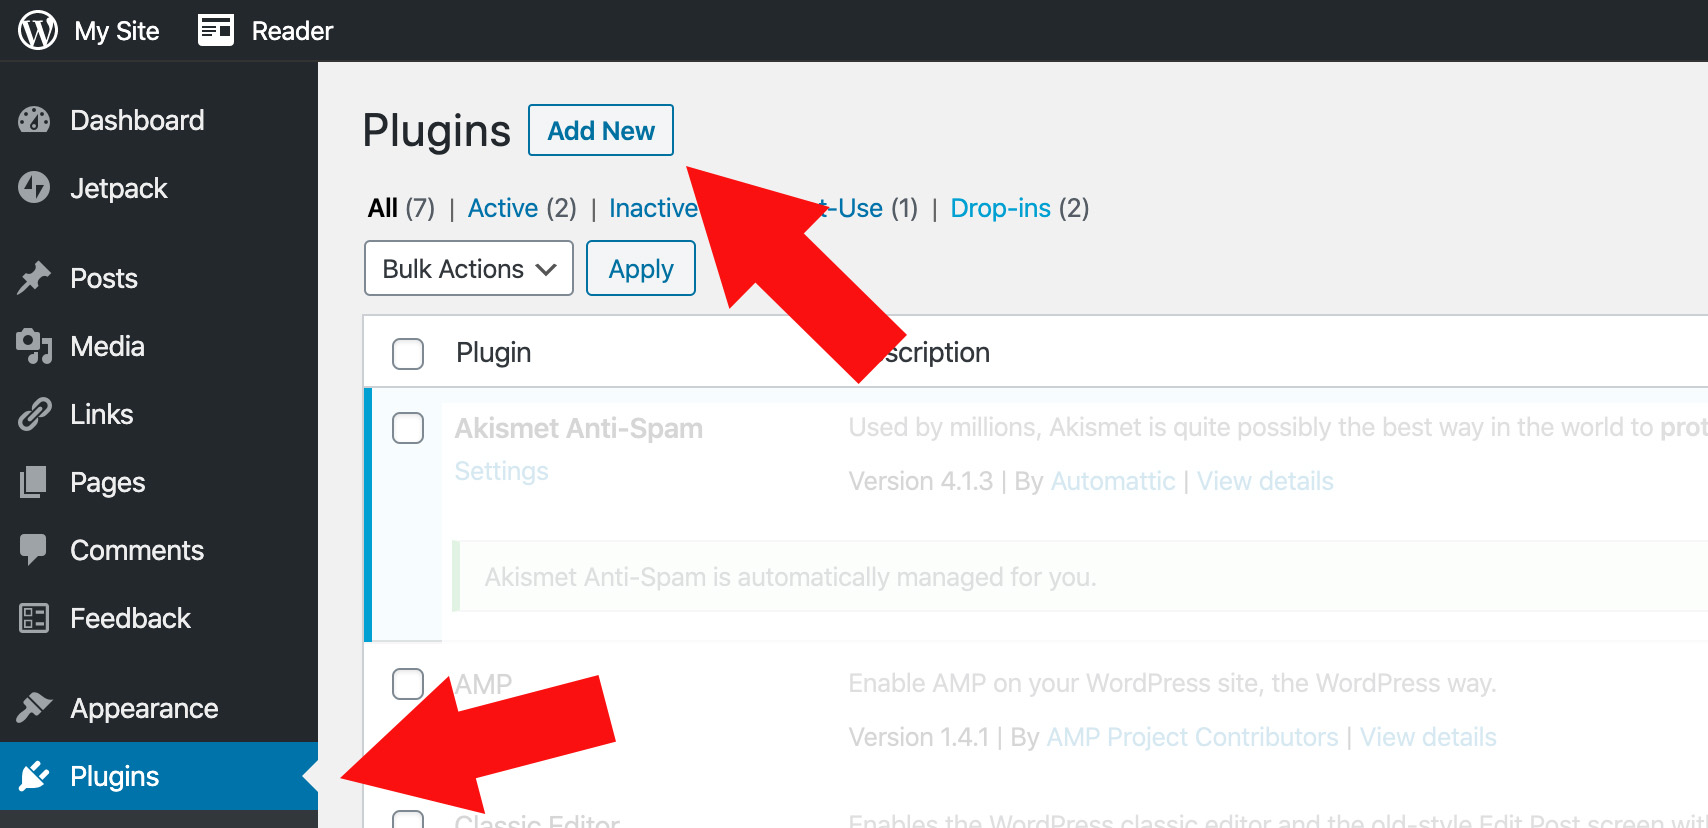
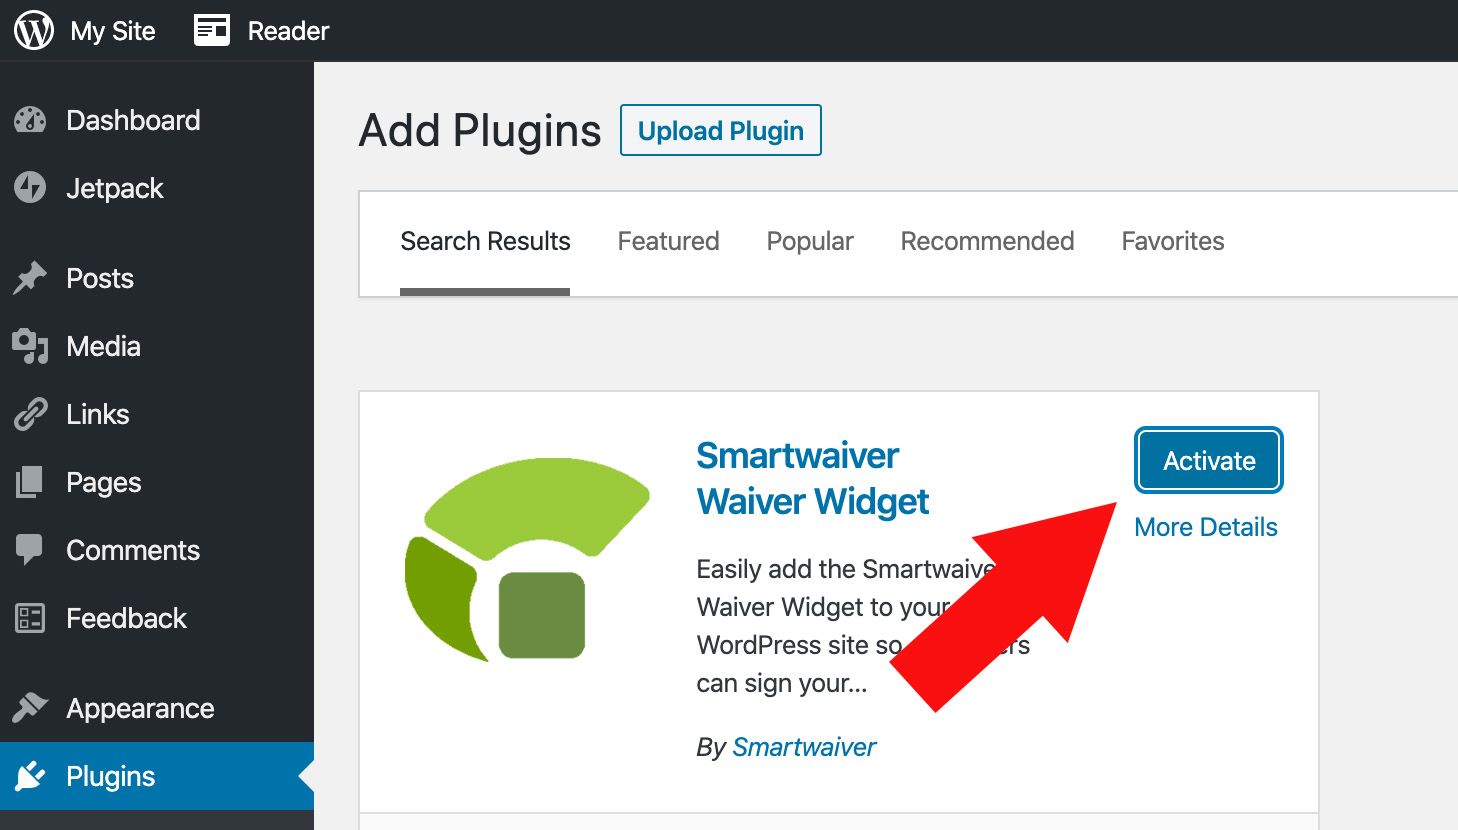
3. Search for Smartwaiver Waiver Widget then click Install Now.

4. Click Activate.
Your plugin is now installed. Leave your WordPress admin page open and log in to your Smartwaiver account from a new browser window.
From Smartwaiver:
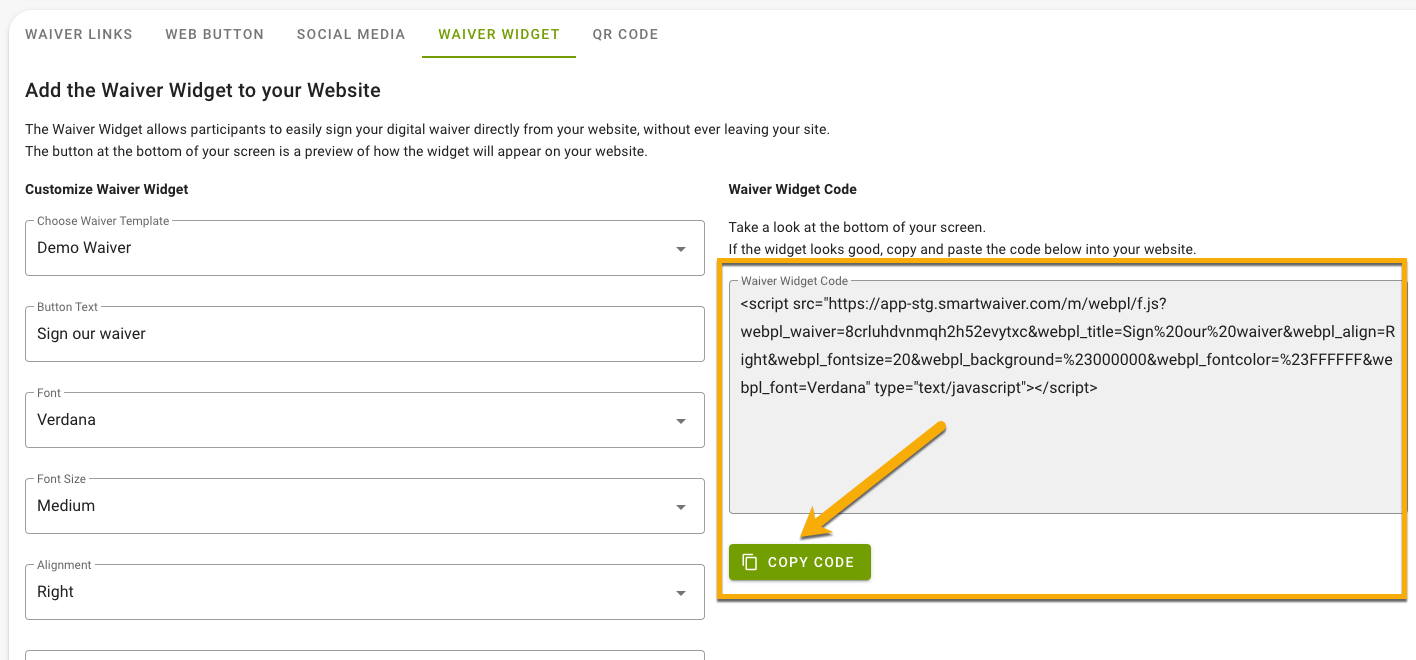
1. Click on the Add To Your Website button and then click on the Waiver Widget tab.
2. Customize the look and feel of your widget and then click on the Copy Code button.
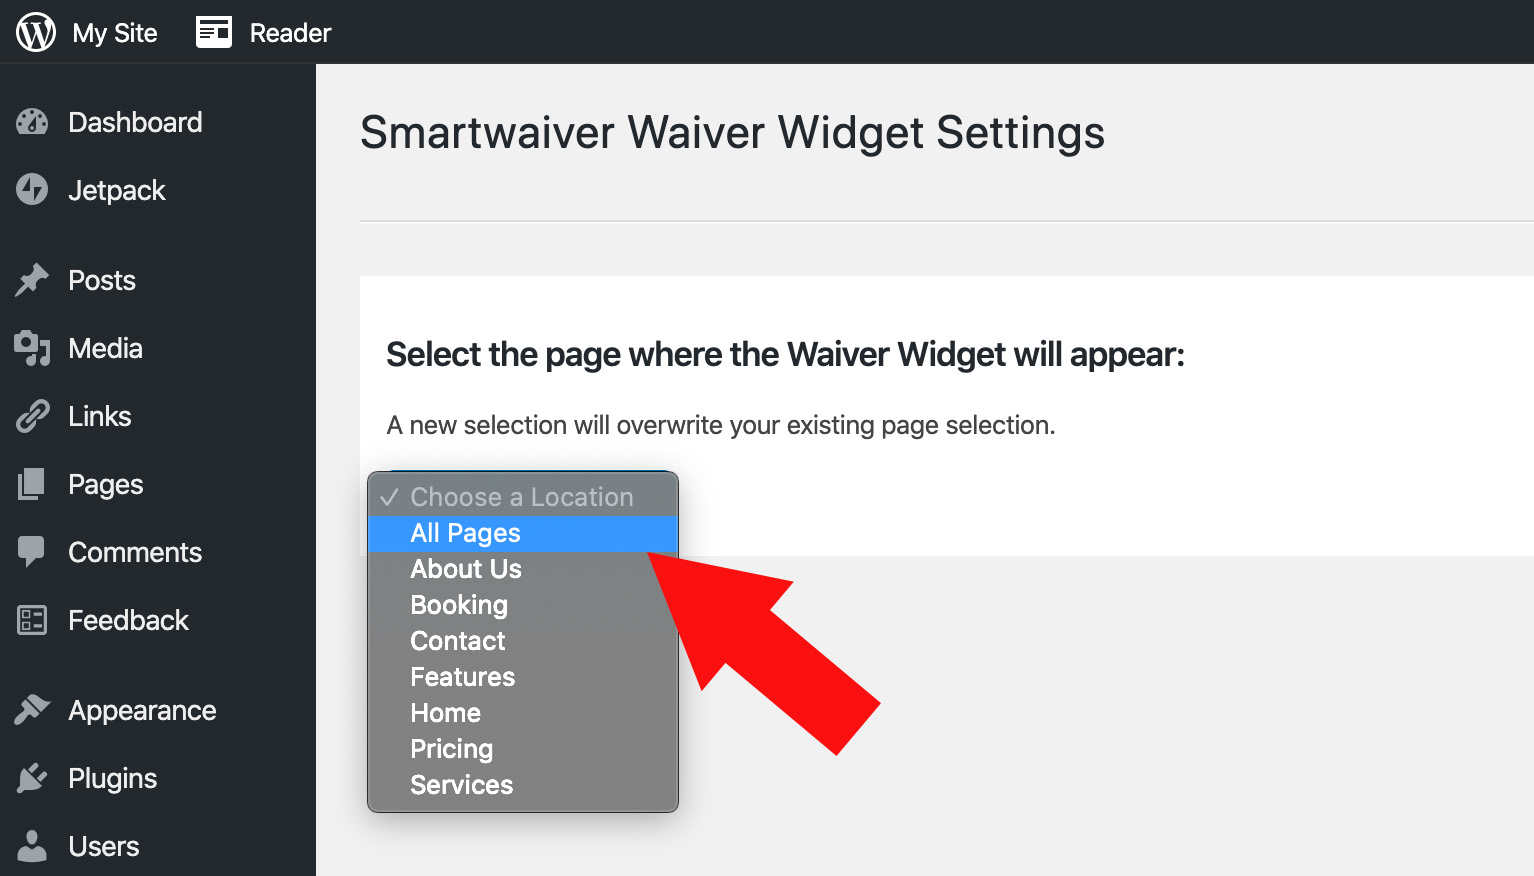
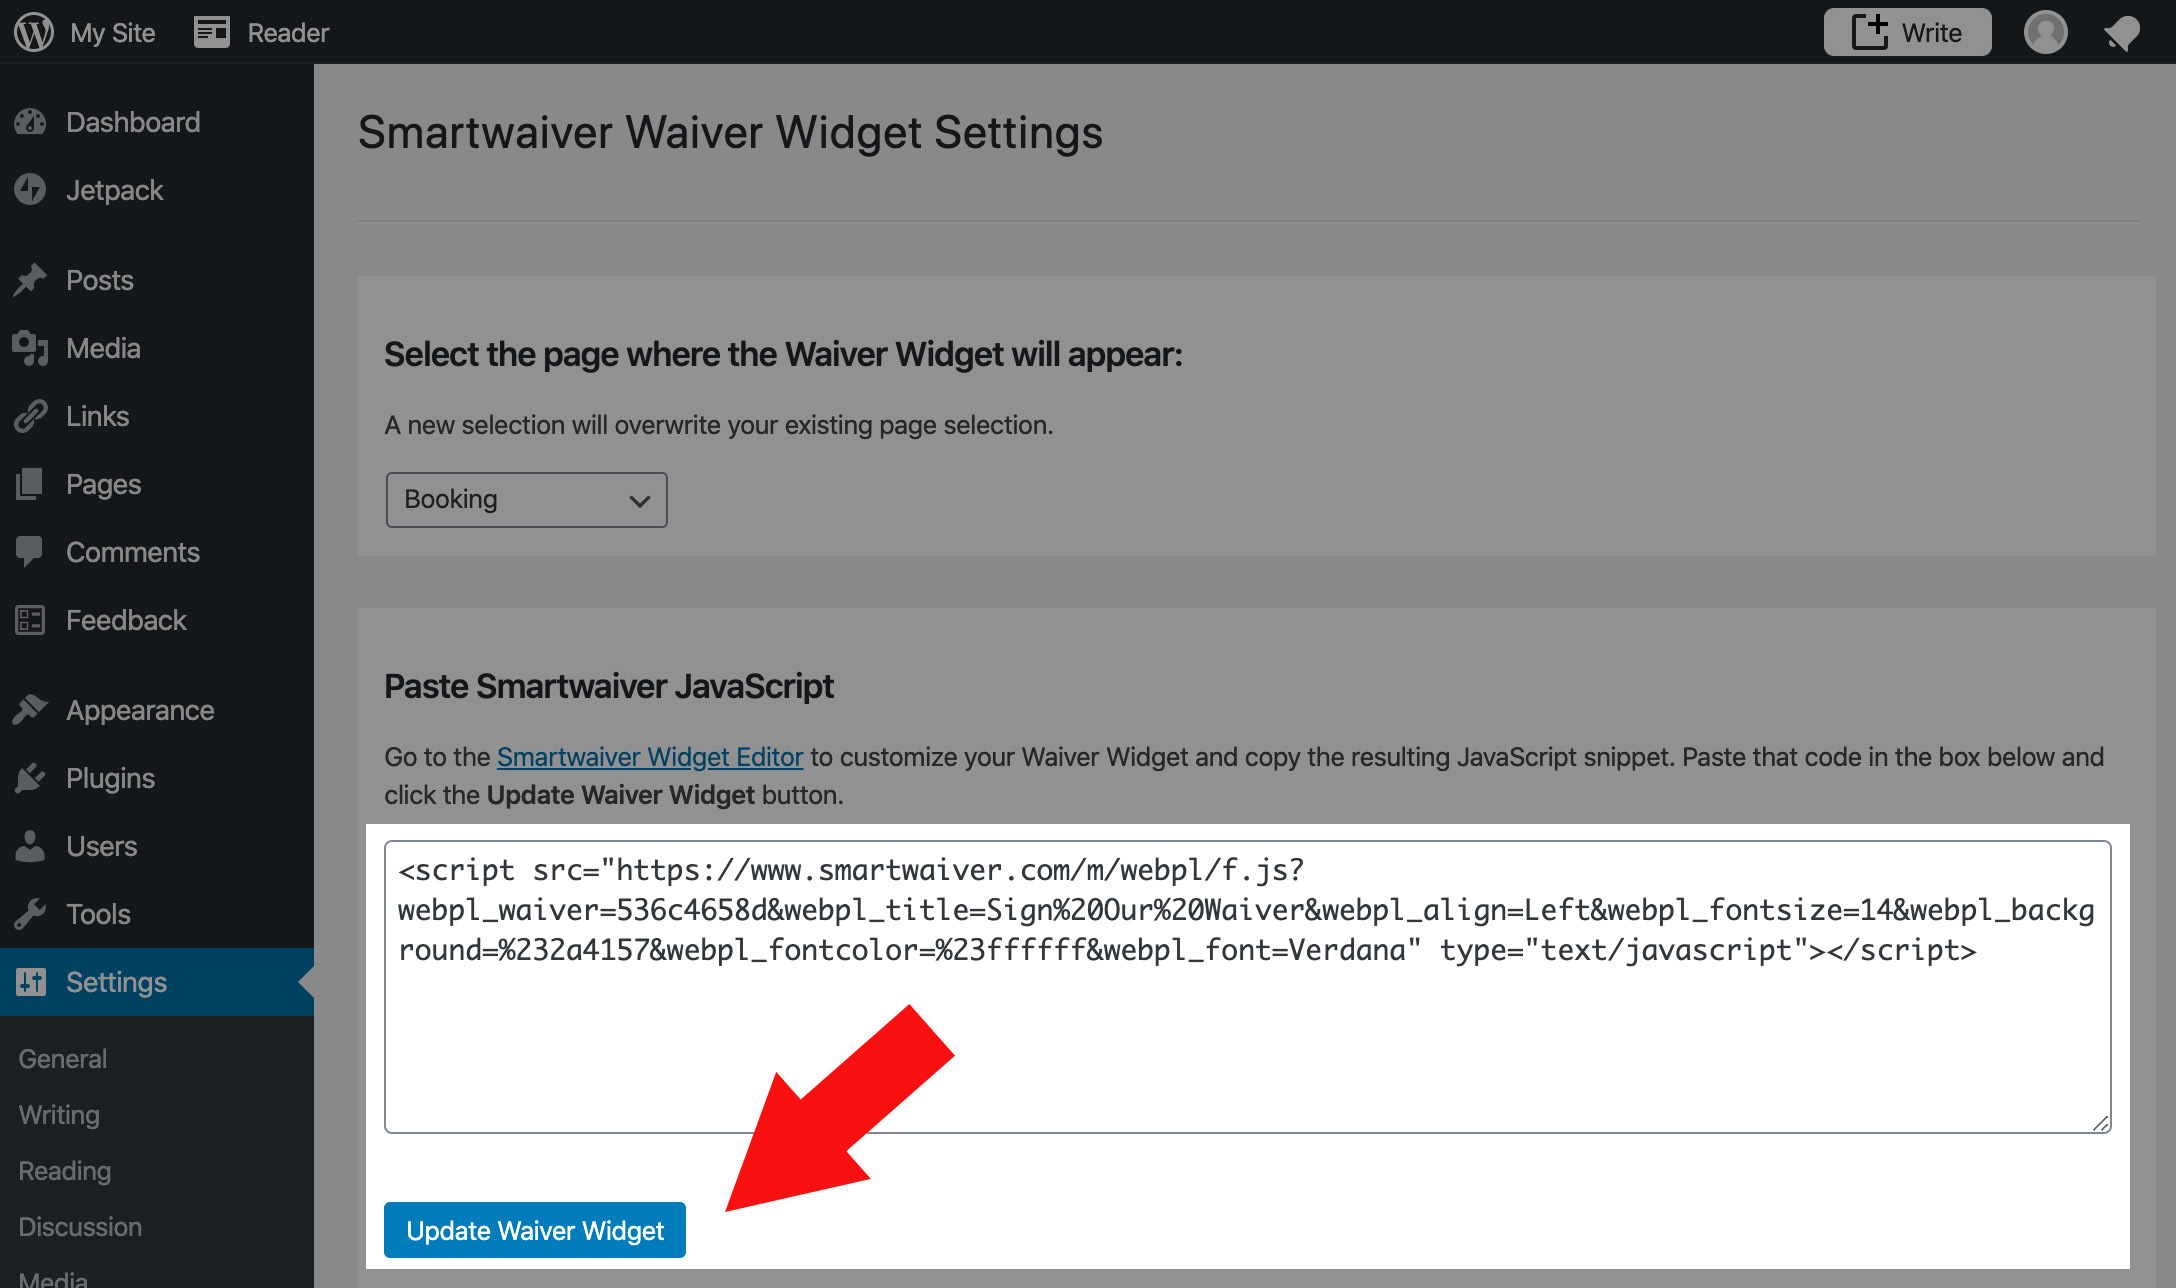
3. Go back to your WordPress admin page and click on Settings > Smartwaiver.
4. Use the dropdown menu to select either a single page or All Pages.
5. Paste the Smartwaiver code (copied from Step 2 above) into the text box and click Update Waiver Widget.
The Smartwaiver Waiver Widget is now live on your WordPress website. When you open your homepage, you’ll see the widget at the bottom of the page.

Related Article:
How do I add the Waiver Widget to my website?