
Burble Software is a dropzone management solution for skydiving facilities that streamlines the online reservation process for both jumpers and businesses.
To Set Up the Integration:
1. Sign up for a Burble account, and a Smartwaiver account.
2. Email your existing release of liability waiver to support@smartwaiver.com. We will digitize the waiver for you.
- Once the waiver has been digitized, you will need to copy the unique API keyfrom your Smartwaiver account and paste it into your Burble account settings.
3. After logging in, select the last option on the list labeled “Essential Info”
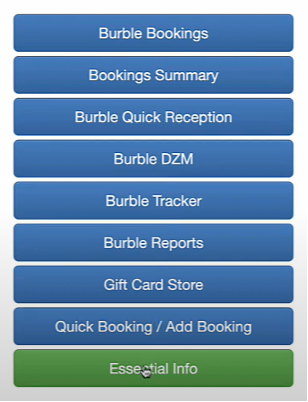
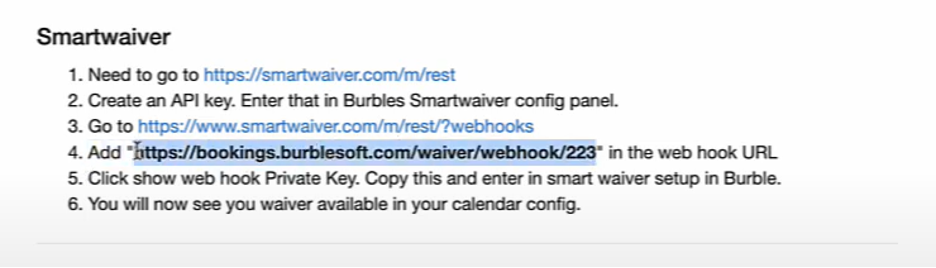
4. Scroll down to the Smartwaiver section on the next screen, and you will see Burble’s set of instructions. On number 4. Of the instructions, you will see a bolded URL.
- Every account will have a different URL, so make sure you copy the exact one associated with your account.
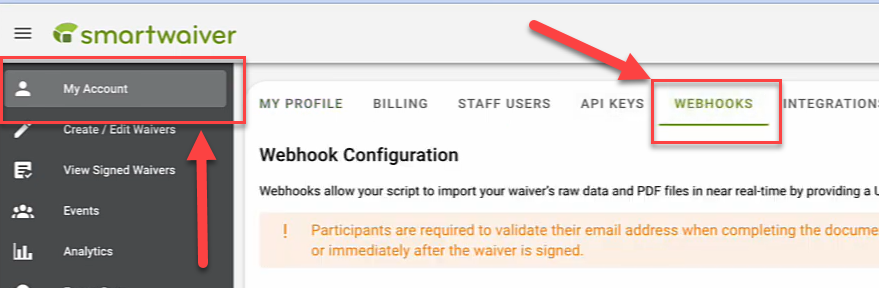
5. Next, we will go back to Smartwaiver and login. At the top of your screen you will see “My Accounts” – then navigate to the tab labeled “Webhooks”.
- Paste the webhook that you copied from Burble into the “Your Webhook Url” box.
- Make sure that the bullets “Web Endpoint” & “Send a Webhook after participant email address has been validated” is selected.
6. Next you will go down to “Show Webhook Private Key” and copy it. You will now paste and input this key into the Burble side of things.
7. Go back to the main menu on the Burble website. You are looking for a button on the top that says “Manage Settings”.
- Next you’ll click “Edit Profile”.
- There will be a tab at the top of this screen that says “Waiver Services”.
- Finally, there will be a field labled “Waiver Webhook Key” half-way down the page.
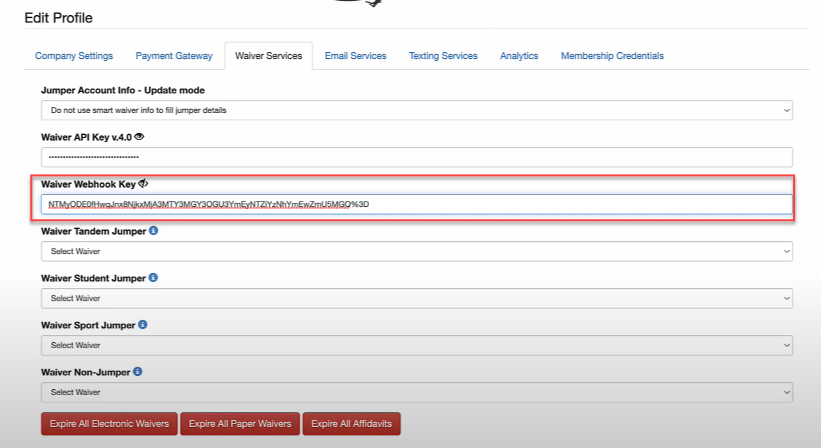
- Paste your webhook from Smartwaiver in this field.
8. Okay, we’re almost there! Next you will create an API key for Burble.
Head back over to Smartwaiver and look for “API Keys” (next to where it said “Webhook” in the previous instruction.)
- You can label the API key whatever you would like.
- Next, Smartwaiver will generate an API key for you.
NOTE – IT WILL ONLY SHOW THIS API KEY ONCE. COPY IT IMMEDIATELY.
9. Head back over to the Burble website.
You’re going to be looking for the box right above the “Webhook” field (that you just pasted in) – which is labeled: “Waiver API Key”.
Paste your key into that box. Remember to click “Save Changes” at the top”.
And you’re done!
There’s one final step that we can do to make sure everything is setup correctly:
After saving, go to your Calendar on Burble by going to Bookings. Next click on the “Administration Menu" at the top. Select one of your Burble calendars and click “Go”.
Scroll down to where it say’s “Waiver Type”. If configured correctly, your waivers will show up on this drop-down menu.
Once the two systems are set up to talk to each other, the information from Smartwaiver is immediately sent to Burble after a waiver is signed and the signed document is attached to your current or future reservation. You can then view the status of the jumper’s waiver in your Burble account.
You can also view Burble's helpful setup video here: